Welcome to our friendly guide to mastering plumosa fern care! Whether you’re a seasoned plant parent or a newbie, this article will equip you with the knowledge and skills to successfully grow and care for your plumosa fern.
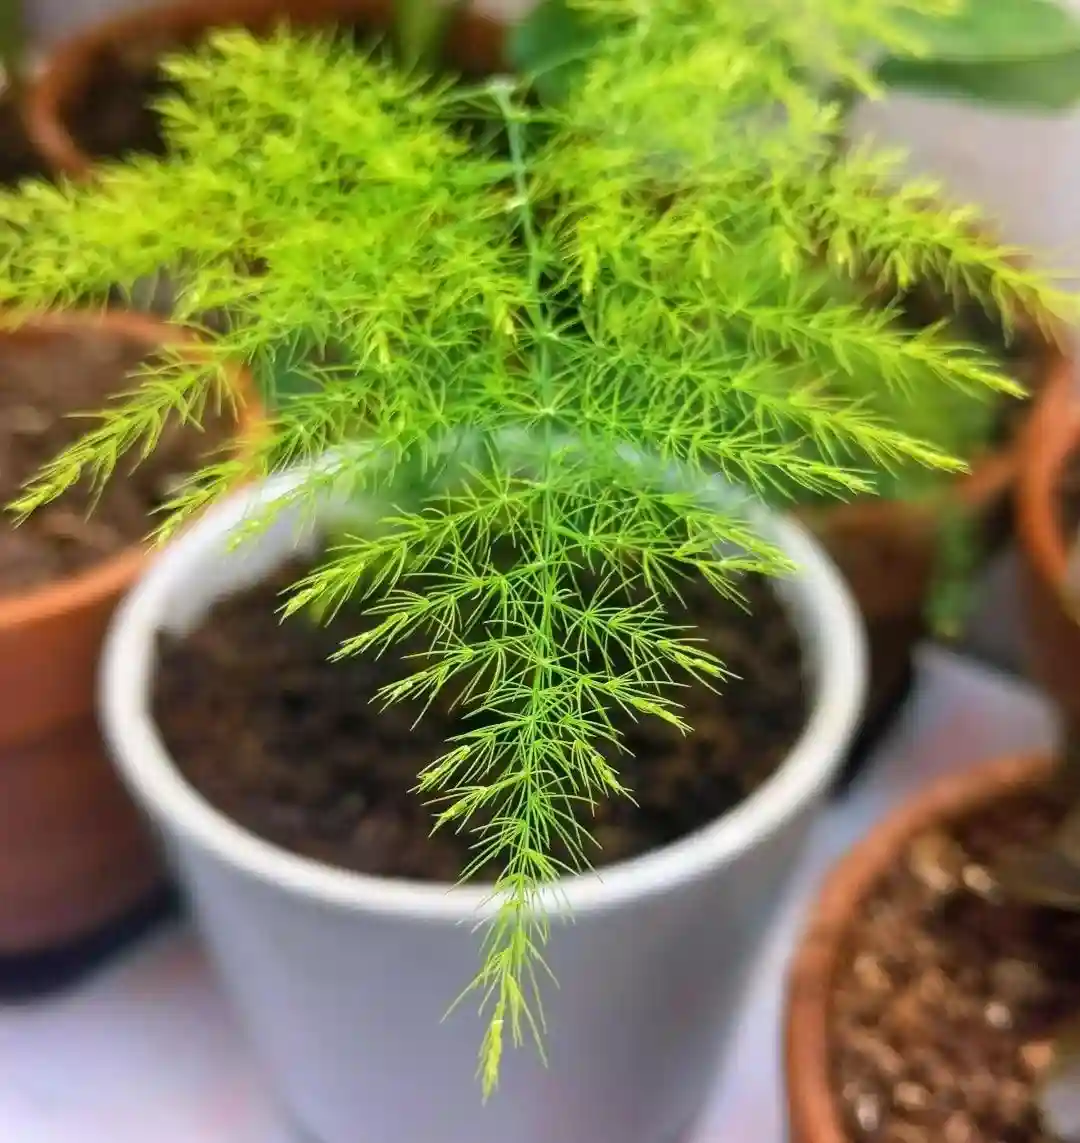
The plumosa fern, also known as Asparagus setaceus or lace fern, is a delicate and graceful plant that is native to South Africa. It has long, feathery fronds that give it a unique and elegant appearance, making it a popular choice for indoor decoration. However, as with all plants, proper care is essential for the plumosa fern to thrive.
Key Takeaways
- The plumosa fern, also known as Asparagus setaceus or lace fern, is a delicate and graceful plant that is native to South Africa.
- Proper care is essential for the plumosa fern to thrive.
Understanding the Plumosa Fern
Plumosa ferns, also known as Asparagus plumosus or lace ferns, are lovely and delicate houseplants that can add a touch of grace to any room. They are native to South Africa and belong to the lily family. These ferns can grow up to several feet high and wide, with thin stems covered in plume-like, green, and needle-like leaves that cascade beautifully.
Plumosa ferns are popular among plant enthusiasts because they are low maintenance and can tolerate a range of growing conditions. However, it’s essential to understand their specific needs to keep them healthy and thriving.
Tip: With the right care, Plumosa ferns can live for several years.
To maintain a healthy Plumosa fern, it’s crucial to provide ample sunlight. These plants prefer bright, indirect light, so avoid placing them in direct sunlight, which can cause their leaves to burn. However, too little light may result in stunted growth and yellowing leaves.
Another aspect to consider is the temperature and humidity. Plumosa ferns thrive in temperatures between 60-75°F and in high humidity. It’s a good idea to place your fern near a humidifier or spritz their leaves with water twice a day.
Tip: To check if your Plumosa fern is getting enough humidity, look for signs such as brown leaf tips or yellowing leaves.
It’s also vital to keep your fern away from drafts and air vents because they can damage the foliage. If you’re using air conditioning or heating in your home, place a humidifier or bowl of water nearby to keep the air moist.
Lastly, Plumosa ferns can be vulnerable to pests and diseases. To maintain a healthy plant, inspect your fern regularly for signs of insect infestation or fungal infections. If you notice anything unusual, treat it immediately to prevent further damage.
Pro Tip: In the winter months, the air inside our homes can get very dry due to heating. To prevent your Plumosa fern from drying out, place a tray of water near it, or place it near a well-humidified room.
By understanding the specific needs of your Plumosa fern and providing the right care, you can enjoy a healthy plant that will last for years to come.

Creating the Ideal Environment for Your Plumosa Fern
Plumosa ferns thrive in bright, indirect light, making them ideal for placement in a north or east-facing window. Direct sunlight can scorch the delicate fronds, so it’s best to avoid placing them in a south-facing window. Additionally, these ferns prefer consistent temperatures between 60-75°F and high humidity levels.
If your home has dry air, consider using a humidifier or setting your plant on a pebble tray filled with water to increase moisture levels. Grouping your plumosa fern with other plants can also help to increase humidity levels around the plant.
When it comes to soil, plumosa ferns prefer well-draining potting mix that retains moisture. To ensure adequate drainage, use a pot with a drainage hole and add a layer of gravel to the bottom before planting.
To promote healthy growth, fertilize your plumosa fern every four to six weeks during the growing season with a balanced fertilizer. Be careful not to over-fertilize, as this can lead to root burn and other issues.
It’s also important to avoid placing your plumosa fern near drafts or in areas with fluctuating temperatures, as this can cause stress on the plant and lead to health problems. By following these best practices for plumosa fern care, you can help ensure your fern grows healthy and strong.
Watering and Feeding Your Plumosa Fern
One of the most critical aspects of plumosa fern care is regularly watering and feeding your plant. Here are some essential care instructions to keep in mind:
Watering Your Plumosa Fern
Plumosa ferns should be kept consistently moist but not overly watered. Overwatering can lead to root rot and other issues. The frequency of watering will depend on several factors, such as the size of your fern, the pot it’s in, and the temperature and humidity of its environment.
As a general rule, you should water your plumosa fern when the top layer of soil feels dry to the touch. To avoid overwatering, ensure that your pot has sufficient drainage, and do not allow your fern to sit in standing water.
Feeding Your Plumosa Fern
A well-fed plumosa fern is a happy and healthy plant. Fertilize your fern every one to two months during the growing season, which typically runs from spring to fall.
Use a balanced liquid fertilizer at half strength to avoid burning the roots. Alternatively, you can use a slow-release fertilizer at the beginning of the growing season for more long-term feeding.
Be cautious not to over-fertilize, though, as this can lead to salt buildup in the soil, which can harm your plant.
Follow these plumosa fern care instructions for watering and feeding, and you’ll be rewarded with a lush and vibrant plant.
Pruning and Propagating Plumosa Ferns
Pruning and propagating are two important techniques that will help ensure the longevity of your plumosa ferns. Proper pruning will allow you to maintain the desired shape and size of your fern, while propagation will give you the opportunity to create new plants from your existing ones. Here are some tips on how to prune and propagate your plumosa ferns:
Pruning Plumosa Ferns
Plumosa ferns can grow up to two feet tall and three feet wide, which may not be suitable for small spaces. Pruning can help you control their size and shape. Here’s how:
- Identify the parts of the plant that need pruning. This may include brown or yellow fronds, or those that have grown too tall or wide.
- Use a sharp and clean pair of pruning shears to cut the frond at the base of the stem. Make sure not to cut too close to the main stem.
- Remove any dead or brown fronds from the plant as soon as you spot them. This will help prevent the spread of disease.
Pruning your plumosa fern regularly will help it stay healthy and vibrant. Just make sure not to prune more than one-third of the plant at a time, as this may stress it out.
Propagating Plumosa Ferns
Propagating your plumosa fern is a great way to expand your collection or share your love for these plants with friends and family. Here’s how to do it:
- Remove a healthy frond from your existing plant. Make sure it has a few leaves attached to the stem, but not too many.
- Prepare a pot with well-draining soil, and make a small hole in the center using your finger or a pencil.
- Dip the cut end of the frond in rooting hormone powder, and then insert it into the hole in the soil.
- Water the soil lightly, and cover the pot with a plastic bag to create a greenhouse-like environment.
- Place the pot in a warm and bright location, but not in direct sunlight.
- Check on your cutting regularly and water it as needed. After a few weeks, you should see new growth appearing.
Once your new plumosa fern has established roots and is growing well, you can transplant it into a larger pot or into your garden. Propagating your plumosa ferns is a fun and rewarding activity that will allow you to enjoy these plants for years to come.
Troubleshooting Common Plumosa Fern Issues
Despite your best efforts, your plumosa fern may experience some problems. Here are some common issues and how to fix them to ensure your fern stays healthy and happy.
Pests
Pests like spider mites and mealybugs can infest your plumosa fern and cause damage to the leaves. To get rid of them, prune any affected leaves and spray the remaining foliage with a solution of water and dish soap. Be sure to rinse the soap off after a few hours. You can also use neem oil or insecticidal soap as a natural pesticide.
Diseases
Plumosa ferns are generally resistant to diseases, but overwatering can cause root rot. If you notice yellowing or wilting leaves, check the soil moisture level and adjust your watering schedule accordingly. You can also use a fungicide to treat any fungal infections.
Leaf Discoloration
If your plumosa fern’s leaves are turning yellow, it may be a sign of underwatering or exposure to direct sunlight. Move your plant to a shadier spot and water it thoroughly. If the leaves are turning brown, it may be due to overfertilization or a lack of humidity. Reduce fertilization and increase the humidity around your plant.
By following these tips, you can keep your plumosa fern healthy and thriving. Remember to give it the care and attention it needs, and it will reward you with its lush and beautiful foliage.


Comments are closed.