
Are you tired of your furry friend scratching up your furniture? A DIY Cat Scratch Post may be just what you need! Not only is it a great way to redirect your cat’s scratching behavior, but it can also be a fun and easy project to do at home. In this article, we will provide you with step-by-step instructions on how to create your very own DIY Cat Scratch Post. So grab your materials and let’s get started on this fun and practical project!
But first, let’s talk about why a DIY Cat Scratch Post is a great idea. Cats have a natural instinct to scratch, which is important for their physical and emotional well-being. However, this can often lead to damage of your furniture and other household items. By providing your cat with a designated scratching area, you can redirect their behavior and protect your belongings. Plus, by making the scratch post yourself, you can customize it to your cat’s preferences and save money in the process. So let’s dive into the steps of creating your very own DIY Cat Scratch Post. Read also 5 Reasons Why Your Cat Needs a Scratch Post.
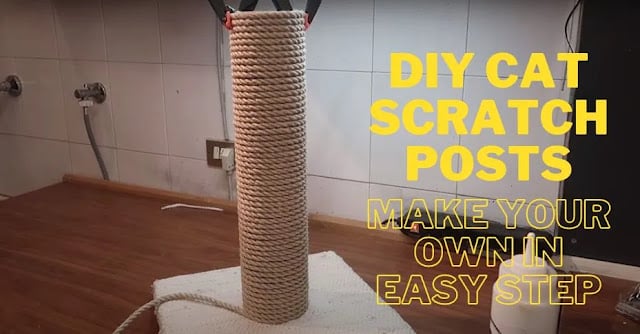
How to Create DIY Cat Scratch Post
Here’s how to create your own DIY cat scratch post in a few easy steps:
Materials
- A cardboard tube (from wrapping paper or a rug)
- Sisal rope or carpet scraps
- Hot glue gun
- Scissors
- Base (a piece of wood or cardboard)
- Optional: Fabric or wrapping paper to cover the base and the tube.
Step 1: Prepare the Base
Choose a base that’s sturdy enough to support your cat’s weight and scratching and fits the size of the tube you’ll use for the scratching surface. You can use a piece of wood or cardboard, depending on what you have available and the look you’re going for.
Step 2: Wrap the Tube with Sisal Rope or Carpet
Cut a length of sisal rope or carpet scraps to fit around the cardboard tube. Use hot glue to attach one end of the rope to the tube, and start wrapping it around, applying glue as you go. When you reach the rope’s end, trim it and secure it with more glue. Repeat the process until the entire tube is covered with rope.
Step 3: Attach the Tube to the Base
Place the wrapped tube onto the base and use hot glue to attach it securely. Ensure the tube is centered and straight and doesn’t wobble. You can also add extra glue to reinforce the bond.
Step 4: Decorate the Base and the Tube (Optional)
To give your DIY cat scratch post a finished look, you can cover the base and the tube with fabric or wrapping paper. Choose a material that’s durable and cat-friendly and that matches your decor. Cut the fabric or paper to size, apply glue to the base and the tube, and wrap it around, smoothing out any wrinkles.
Step 5: Enjoy Your New Cat Scratch Post
Now that your DIY cat scratch post is complete, it’s time to introduce it to your cat and see if they like it. Place it in a spot where your cat can easily access it, and encourage them to use it by offering treats or toys. You can also sprinkle some catnip on the rope to make it more enticing. Remember to read Top 10 Best Cat Beds for Your Feline Friend.
Conclusion
Making your cat scratch post is a fun and rewarding project that can save you money and allow you to customize it to your needs and preferences. Following these simple steps, you can create a sturdy and attractive scratch post that your cat will love. Happy scratching!
FAQs
Can I make the DIY cat scratch post taller or wider?
Yes, you can adjust the size of the scratch post to suit your cat’s needs and the space you need.
Can I use any rope or fabric for the scratching surface?
Yes, as long as it’s rough and scratch-friendly, you can use any rope or fabric you like. Some popular options include sisal rope, jute rope, burlap, and rough upholstery fabric.
Do I have to use a cardboard tube for the post?
No, you can use any sturdy cylindrical object as the post, such as a PVC pipe or a broomstick.
Can I add other elements to the post, such as a perch or a toy?
Yes, you can add other elements to the post if you like. Just make sure that they’re secure and won’t harm your cat.
Can I paint the post?
Yes, you can paint the post if you like. Just make sure to use non-toxic paint that won’t harm your cat.
How often do I need to replace the scratcher post?
It depends on how often your cat uses it and how well it’s holding up. On average, you may need to


Comments are closed.